述語項構造シソーラスのdownload版を更新しました.大きな変更点としては,ARG0, ARG1,ArgM-TMPなどPropBankスタイルの意味役割を追加したことです.excel版も追加したので表計算ソフトで利用したい方も簡単に使えます.
downloadはこちらから.http://pth.cl.cs.okayama-u.ac.jp/download/

述語項構造シソーラスのdownload版を更新しました.大きな変更点としては,ARG0, ARG1,ArgM-TMPなどPropBankスタイルの意味役割を追加したことです.excel版も追加したので表計算ソフトで利用したい方も簡単に使えます.
downloadはこちらから.http://pth.cl.cs.okayama-u.ac.jp/download/
朝倉出版から「コーパスと自然言語処理」松本裕治,奥村学(編)が出版されました.第6章の語彙概念と述語項構造を担当しました.
第3章の浅原先生がご担当されたところは,形態素解析のモデルル化として,HMMや最大エントロピー法,CRFの説明が分かりやすいです.Random Fieldを描いている説明はなかなか見ないです.また,教師無し学習についても記述されていて,ディリクレ過程(分布の方では無く,手続きで定義する方),Chinese restaurant processing, さらにPitman-Yor過程の説明が図と共に分かりやすく書かれていて,興味のある方は必見だと思います.
CentOS7.3 にowncloudを入れる場合,いろいろ分からないことがあったのでメモ.ここでは全て書かずに,ポイントだけ書きます
概要とポイント
以上までの手続きは下記あたりを参考にした (リンクは切ってます)
http://blog.livedoor.jp/rappazubon/archives/52202106.html
(http://noaboutsnote.hatenablog.com/entry/owncloud90#%E3%82%A4%E3%83%B3%E3%82%B9%E3%83%88%E3%83%BC%E3%83%AB)
ところが,他のパソコンから画面が見えない..ここからがこのページの本題
localhost以外のアクセスでのエラー
例えば
http://192.168.1.30/owncloud
などipaddressや
http://owncloud/owncloud
などドメインでアクセスした場合に下記のようなエラーが出ました.
You don't have permission to access /owncloud on this server.

Additionally, a 403 Forbidden error was encountered while trying to use an ErrorDocument to handle the request.
アクセスできない.これは実はpermissionのせいでは無く,意図して出されているようです.
yum でインストールした
の方法で入れたところ owncloud 9.1.5がインストールされました.
このとき,上記のエラーに関連する設定ファイルは下記です.
/etc/httpd/conf.d/owncloud.conf
そしてowncloud.confを読むと,改変しないことと外部からアクセスするときはシンボリックリンクを作るように指示が出ています.なのでそれを作成
cd etc/httpd/conf.d/
ln -s /etc/httpd/conf.d/owncloud-access.conf.avail /etc/httpd/conf.d/z-owncloud-access.conf
systemctl restart httpd
これで,http://192.168.1.30/owncloud など,localhost以外のマシンからアクセスしても上記のエラーは出なくなりました.
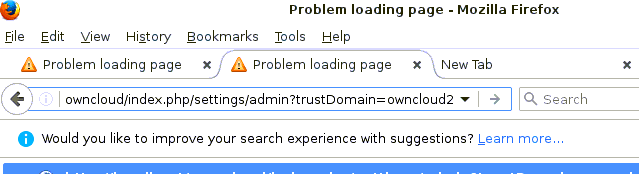
しかし,アクセスすると今度は trusted domain ではない下記のようなエラーが出ます.
(信頼されないドメインからサーバーにアクセスしています)

このtrustedの意味が上記の日本語のメッセージと異なり実は「owncloud2」というホスト名が問題でこれを登録することが解決方法となります.
(注: 上記のエラーメッセージ(日本語)では,アクセス元のパソコンのドメインが問題のように解釈できますが違うようです)
上記の問題に関連するファイルは
/usr/share/owncloud/config/config.php
で関連する部分はここです
'trusted_domains' =>
  array (
    0 => 'localhost',
  ),
ここがlocalhostという名前しか登録してないので http://localhost/owncloudという名前しか受け付けないというものです.前の0などの数字を増やしながらいくらでもかけるようです.しかし,このファイルは直接書き込むことは推奨されていません.owncloudが自分で書きに来ます.
上記のtrusted domainのエラーが出ると同時に「owncloud2を信頼できるドメイン名に追加」とあります.押してもアクセスできないのでエラーになります.なのでそのリンクだけコピーします.
そしてVNCなど,owncloudサーバのコンソール上でfirefoxを立ち上げて先ほどのパスを投入します.すると下記のように信頼するけど「ok」ですかと尋ねられるのでokを押すと外部からアクセスできます.

よってこの変更は例えば http://192.168.1.30/owncloudでもアクセスしたい場合はこれも同様に登録する必要があります.
さて,上記の変更後さきほどの
/usr/share/owncloud/config/config.php
を確認すると追加されていることがわかります.
'trusted_domains' =>
  array (
    0 => 'localhost',
    1 => 'owncloud2',
    2 => '192.168.1.30',
  ),
なので確認はしてないですが,これを直接書いても同様にアクセスできると思います.
また3,4などさらに違う名前でアクセスしたい場合は増やせるようです.
M1の泉仁さんが言語理解とコミュニケーション研究会で発表しました.プログラムはこちら http://www.ieice.org/ken/program/index.php?tgs_regid=51bc042929098fdf747b146f56f55625294601e2559fb1c19c59862485e7cc57&tgid=IEICE-NLC&lang=
書誌情報
泉仁宏太・竹内孔一・大野雅幸・田口雅弘・稲田佳彦・飯塚誠也・阿保達彦・上田 均,小論文採点支援のための関連文書取得法の考察,電子情報通信学会 言語理解とコミュニケーション研究会, NLC2017-24, pp.47-51, 2017, 9月8日 (7-8日), 東京.
M1の大野さんが Yangonで開催されたPacling2017で発表しました.http://pacling.ucsy.edu.mm/pacling/pSchedule2.html
書誌情報はこちら
Masayuki Ohno, Koichi Takeuchi, Kota Motojin, Masahiro Taguchi, Yoshihiko Inada, Masaya Iizuka, Tatsuhiko Abo and Hitoshi Ueda. Construction of Open Essay Writing Data and Automatic Essay Scoring System for Japanese, in Proceedings of The 15th International Conference of the Pacific Association for Computational Linguistics (PACLING2017), Yangon, Myanmar, pp.215-220, 17th (16-18), August, 2017.
ASA Scalaの更新版を作成しました.
コピュラ文での名詞と「だ」部分の分離,バグfix,activator での作成など更新しています.
起動方法が異なります.
http://www.cl.cs.okayama-u.ac.jp/study/project/asa/asa-scala/download/
研究室に新4年生を迎えました.
Webサイトを更新しました.CMSそのものを入れ替えてコンテンツなどを整理しました.更新によってなにか今まで公開していた古いデータなどがもし必用な場合はご連絡下さい.
Webサイトがcl.cs.okayama-u.ac.jpから www.cl.cs.okayama-u.ac.jpに変わりました.
竹内孔一講師が岡山大学工学部教育貢献賞を受賞しました.